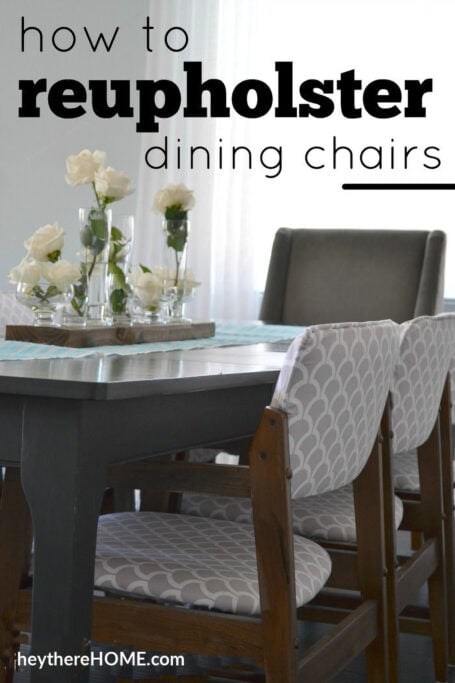
How to Reupholster Dining Chairs
Reupholstering chairs for your dining room is a super cost effective way to update your dining room. Whether you’ve got chairs to recover or find some secondhand, reupholstering dining chairs is easier than you might think. Believe me, before taking on this project I didn't know how to reupholster a dining chair, but if I can do it, you can do it!
It all started when I finally had a chance to get back to focusing on my dining room makeover.
The hubs didn't even roll his eyes when out of nowhere I was drawing a hexagon pattern the walls, to create the look of wallpaper -which by the way, wasn't even in the original plan. Even without the eye roll, I know he thinks I'm nuts…but totally supportive of my need to be creative.
Each chair is a little different, but I’ll show you the steps for how to reupholster a chair so you have a good idea of the scope of the project and can feel confident to take on your own chair reupholstering.

Your home doesn’t feel off because you need more stuff.
Grab my free guide to spot the 5 decorating mistakes that make a home feel scattered, mismatched, and not quite right.
This post contains affiliate links for your convenience. Read the full disclosure.
How To Reupholster A Chair
Depending on the style of the chair you will need to restore any wood elements, as well as reupholster the dining room chair seat and back, and add piping if necessary.

How I found these dining chairs to recover
I am a huge fan of finding used furniture online, so when I was browsing one Saturday and saw these chairs for only 60 bucks (for all 6 of them) my hamsters started running at full speed! - I'd pinned a mid century dining chair that had almost these exact lines that I couldn't get out of my head. And 10 dollars a chair! A no brainer!
Restoring the wood frames of the chairs
First I had to take the chairs apart which, in this case, was pretty easy because the screws were in plain sight. I made note of how the chair backs and chair seats came apart, in order to put them back together the same way, and labeled baggies to store my screws based on where they came from.


I spent the afternoon, just my chair frames and I, in the backyard sanding - and scraping gum. So gross.
I used an electric sander and 100 grit sand paper to remove the old finish but keep the wood nice and smooth.
Tip: The higher number sand paper is the finest, which takes off just a light amount of finish and keeps everything smooth.


Once that was done, I cleaned the wood chair frames using a damp towel and gave them a nice coat of stain. I used MiniWax in Dark Walnut.
How to Reupholster A Chair Seat
It turns out that the gum situation on the wood frames was nothing in comparison to the yuck I found on the chair seat cushions which made recovering the chair seats interesting. The previous owners of these chairs had invited some gum chewers with NO manners to dinner.
It kept me quite entertained as I took out one staple after another.
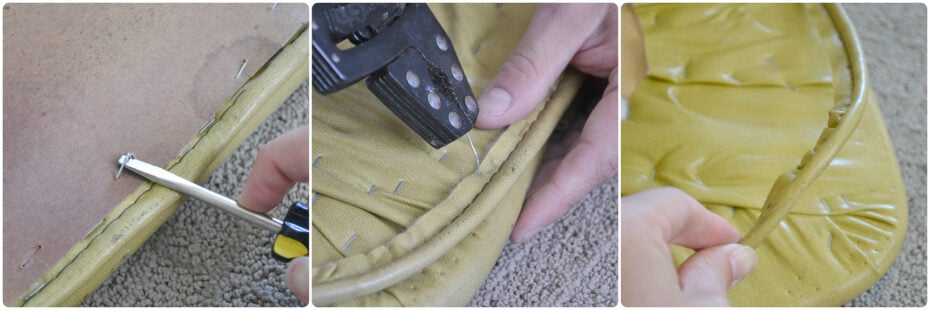
Step 1: Remove the old piping and fabric if necessary
When I went to recover these dining room chairs, I decided not to remove the old fabric because they were covered in vinyl. Vinyl is a great option for dining chair seats because it's waterproof and I didn't want to have to get into replacing the seat cushions underneath.
I used a flat head screwdriver to lift out the staples that held on the cardboard cover and to remove the piping, which I reused later.
Tip: If a staple gets stuck, use a pair of pliers to yank it out.
Then, I gave each seat cushion a good cleaning with a paper towel and cleaner so they wouldn't get the new fabric dirty.
You May Also Like


Step 2: Cut the fabric for the chair seat
I found a simple grey and white scallop fabric on Fabric.com (now Amazon Fabric) but there are many amazing places to buy fabric online.
Before cutting decide which way you want your fabric to go on your finished product and be sure to check that it's going the right way before cutting each piece.
Lay each seat cushion on your fabric as a guide for where to cut.
I cut about 3-4 inches away from the edge of each seat cushion and ironed out the wrinkles from the backside of the fabric.

Step 3: Attach the fabric to the chair seat cushion
Then, I laid the seat cushion back onto my piece of fabric, print side down, (double check the direction of the fabric again) and folded one edge up and over securing it using a staple gun in 3 places.


You'll want to make sure not to staple too close to the corners.
To ensure there are not creases on the top side of the cushion I pulled the corner tightly right from the middle and secured it with staples.
Then I gathered a little bit of fabric at a time and moved it around until I only had creases on the underside of the cushion and stapled it in place. You'll get the hang of this really quickly.


Repeat on the opposite corner making sure to pull the fabric tight across the seat cushion. Then, repeat for the other 2 corners.
When you're done with the seat cushion the underside will look like a mess, but the top will be nice and clean!


Seat cushion #1 done…5 to go!
You May Also Like


How To Reupholster The Seat Backs
The chair seat backs of these wooden dining chairs required a little bit of sewing. I decided that I liked the piping detail on these and wanted to mimic the same thing so I had to create a pattern to use for each seat back.
Now you should know, I am not a master seamstress. I've pretty much taught myself through trial and error, but hey, it seems to work!
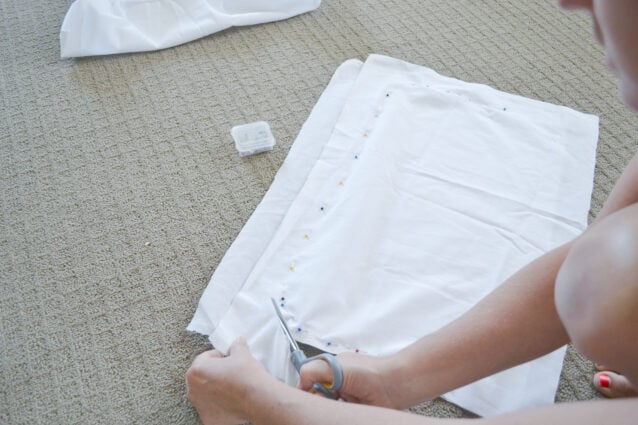
Step 4: Make a pattern for your seat backs
Use a scrap piece of fabric (part of an old flat sheet will work) and lay your seat back on it.
Then, cut around it leaving about 3-4 inches.
Repeat the same steps to make a piece for the back, or you could just double the fabric and do one cut.

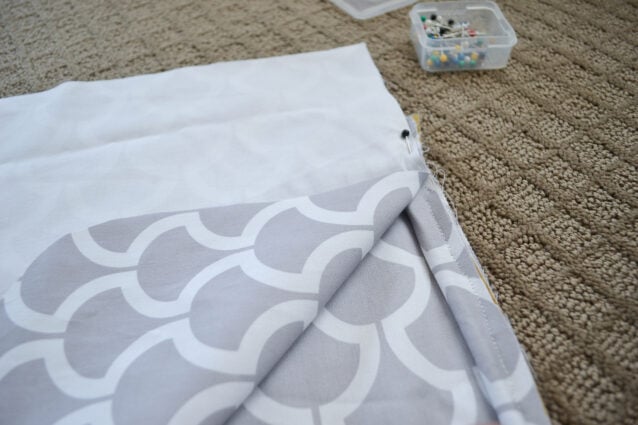
Sandwich the seat back between the two pieces of fabric and pinch the fabric together where you want the final seam to be, and pinning together as you go.


Notice that my pins run along the back side of the top of the seat back. This is because I want my piping to be in this location, so I actually will have more fabric for the front pieces of my seat backs…see the picture below..to account for the rounded edge here.

When it's pinned in place on 3 sides, double check to make sure it's taunt and smooth, then remove the seat back.
Finally, cut out the shape, using your pins as a guide, and leaving about 1 inch for seam allowance.
Label each side (I used "F" for Front and "B" for Back…I know, so sophisticated) so that you know which one is which, but also so you know which side will be facing out. This side will ultimately be the side with the print on it.


Step 5: Make the piping
I didn't start out knowing how to reupholster a chair with piping so I ended up reusing the piping that I took off of the seat cushions as a guide. I don't have a picture, but I took off the vinyl that you see below and used the piping inside.
Then measured out how long it needed to be by laying it along the existing piping on the seat backs and cut it to size.
I cut a 2 inch wide strip of my fabric (be sure it goes in the direction you want) so that when I fold it over the piping I will have 1 inch on each side. This will also act as my seam guide later. - I know, sometimes I impress myself!


Step 6: Sew the seat backs
Time to cut out some pretty fabric for my seat backs!
Lay out your fabric print side down paying attention to the direction of your print and how you want it to go.
Then, lay your pattern piece face down also (your "F" or "B" will be face down) and cut right along the pattern.


Don't bother pinning it together, but you could if you want to.
Repeat with the other piece of your pattern again paying attention to the direction of your pattern. Sorry I keep repeating this, but it is so important!
Step 7: Add the piping
Fold back the edge of your top piece of fabric and lay your piping in place.
Remember how you cut 2 inch wide strips? Well now you can simply line up the edge of the piping (folded over it's 1 inch) along the sides of the fabric and you'll have your sewing line too! The rounded part of the piping will go inward as shown.
Pin all the way around, making sure that you line up the edges. Now you're ready to sew them together!
So using the piping as your 1 inch seam guide sew away!
I used a zipper foot so I could get as close as possible to the piping.
In fact, I realized that I had to run each seat back through the machine twice (see the picture). The inner stitch is my second round. The second time I was able to get much closer to the piping. You want your piping to be tight for the best look.

You can cut off some of the excess fabric so it doesn't make your chair look lumpy.

Almost there!
Step 8: The last step to reupholster chairs!
After turning the cover right side out, put it on the seat back and adjust it so the piping is in the right spot and then to finish it off use a staple gun.
To do this pull the fabric tight down the front side and secured it with a staple then fold the corners sort of like you're wrapping a present.


For the last seam I folded it under before stapling it so it had a finished look.

I'll be honest, reupholstering dining room chairs was a biggie…but so worth it!
Between mommyhood, and life, and some other projects, I had to work in stages but the end result was sooooo worth it! - I mean c'mon where could you find dining chairs for about 20 bucks each? I.love.them.
When I finished all of this, it was time for the big moment…putting them back together!


Reupholstered Chairs Before And After


P.S. What if I told you there's a whole new (and way easier) way to decorate your home—without the overwhelm, indecision, or endless Pinterest scrolling.

Inside my online decorating program, Style Your Way Home, I'll walk you through the process of discovering and defining your decorating style, creating a home decor plan, and show you how to apply it in any space so each room is unique while maintaining a cohesive look that feels like YOU! - When you join now, you'll get direct support from me... it's like having a design BFF in your back pocket!
Frequently Asked Questions - Upholstering Dining Chairs
What is the name of your chair fabric?
I used Michael Miller Bekko Home Decor Billow Slate and you can get it from Etsy.
How much fabric should I use?
You should be able to do two similar chairs with one yard. Measure the seat and back and add it up. A lot will also depend on the width of the fabric you choose. I would order just a little extra for mistakes too.
If I reupholster over the existing fabric, won't the old fabric still show?
If your new fabric is lightweight and you can see through it, you can add a white or dark solid fabric between so you can’t see the original fabric.
