DIY Painted Vases With Texture – West Elm Inspired
Hiya there! Ok so I have a major problem with plants. I can't seem to keep any of my house plants alive. I kill them every. single. time.
I don't do it on purpose but it is definitely involuntary PLANT-slauter.
Haha. See what I did there?
So I'm going to try succulents! You've probably seen the rising succulent trend and I figure hey, if they can live in the desert, they have a chance of surviving my very un-green thumb right?
So I had to create a pretty place for them to live and when I was flipping through the West Elm catalog I was inspired by their textured vases and you know me, I just had to figure out a way to create the look for less.
So today I'm going to show you how to create texture on glass just like I did on these DIY Painted Vases!

This project is super simple. Here's what you'll need.
Supplies for DIY Painted Vases
This post contains affiliate links for your convenience. Read the full disclosure.
- Glass vases- I had mine on hand, but a good place to look for inexpensive ones is a dollar store or even thrift stores. Just look for ones with shapes you like.
- Sharpie - a light colored one is best
- Repositionable spray adhesive
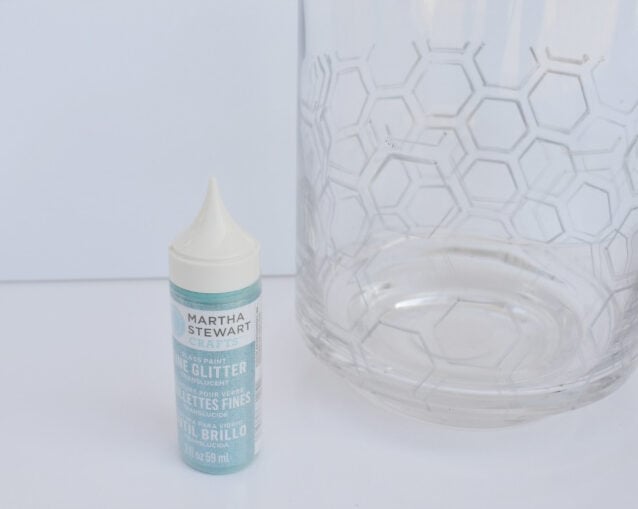
- Glass paint- (I used Martha Stewart glass paint because it comes with a tip that allows you to draw with it. Puff paint would probably work too.)
- Spray paint- I used Krylon Gold Spray Paint and Rust-Oleum Satin White
- Painters tape
- (optional) 12 x 12 Stencil- (I found this hexagon stencil on Amazon and plan to use it again on a pillow project soon!)

You May Also Like


How to Create Texture on Painted Vases
Step 1: Trace stencil on vase
If you're using a stencil, you'll want to give it a light coat of spray adhesive. It will help it stay put while you trace.
Place the stencil on your vase about ⅓ the way up and trace your pattern with the Sharpie.
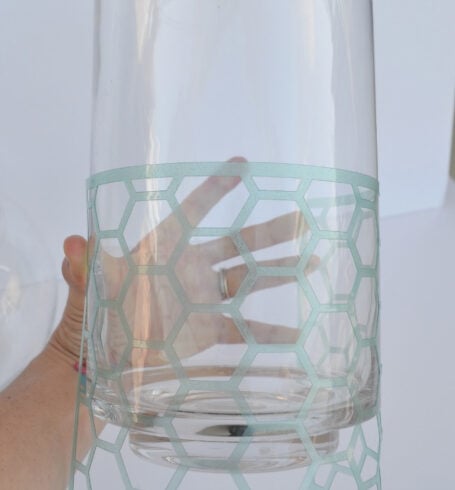
Step 2: Add glass paint
Go over your pattern with glass paint. This is what is going to create the texture. You don't need to use a certain color because you will be covering it up with metallic spray paint later.
Let your glass paint dry.

Step 3: Create a line
Create a paint line with painters tape right where your glass paint pattern ends. I found it easier to do this with the vase upside down as shown.
Once you have that first line cover the remainder of the vase with paper towel to protect it from the spray paint we are about to apply.


Step 4: Add spray paint
Spray paint the textured portion of your vase. I used Krylon Metallic Gold for the hexagon vase and Rust-Oleum Semi Gloss White for my herringbone vase. succulents!
Once they are dry, you can add your succulents!

Layer the Succulent Terrarium
Again, I'm not great when it comes to plants, but after talking to some friends that have had success with succulents I learned that they need really good drainage so you need to create layers. Here is how I did it.
Oh and don’t forget you will want your succulents to end up being just above the paint line so keep that in mind when you are filling your vases with these layers.
- The bottom layer is gravel or rocks. I used rocks.
- Then you need a layer of dirt. I just used the dirt that came with my succulents.
- So I guess this is where you put your succulents in.
- Then place about an inch of moss over the dirt and around the succulents.


This is such a cool way to add some texture!


P.S. There's no better way to create a cohesive feel than with color, but in order to avoid mistakes and get an updated look you've got to understand color like a designer.
Inside my online course, Color Made Clear, I will teach you exactly what you need to know about selecting colors for your home in everything from paint colors, to flooring and carpet, to fabrics so you can make confident color decisions and get the exact look and feel you're going for. - Even if there are finishes in your home you can't change, I'll show you how to use color to distract from them for an updated look!
