How To Add Shelves To Existing Office Furniture
So you know the other week when I hinted at some major girl power progress when it comes to doing projects myself over on Instagram?
Well you guys, I completed my first official built-all-by-myself piece of furniture, power tools and all!
Yep.
I had been day dreaming about how I could take our old Ikea filing cabinet and turn it into a full fledged storage unit for our office and the reality is that my husband, who usually helps me with bigger projects like this, has been so incredibly busy and I was getting impatient.
I am no newbie when it comes to DIY and I’ve used power tools before, but for some reason I was a bit of a fraidy cat when it came to being all by myself when using them.
Not anymore. I think I may have just unleashed a serious power tool addiction.
Does Decorating Feel Confusing? - It's because you're starting in the wrong place.

The secret isn’t more inspiration - it’s a clear plan.
Grab my free Function First Decorating Guide and learn the simple first step that makes every decorating decision easier.

This post contains affiliate links for your convenience. Read the full disclosure.
I mean, look how great my new and improved filing cabinet looks! It’s like it was meant to have the upper shelves there all along. Definitely a huge improvement in terms of storage in the office.
I’ve been working hard to turn our office into a super efficient and creativity inducing space and if it were all mine it would be easy to do, but my husband and I share this space and well, the guy has a lot of paperwork!
The problem with the original plan…
The original plan was to have him use the two file drawers but what I didn’t realize was that he has a lot of reference books and binders that he also needs access to, so one simple shelf above the file drawers wasn’t going to cut it.
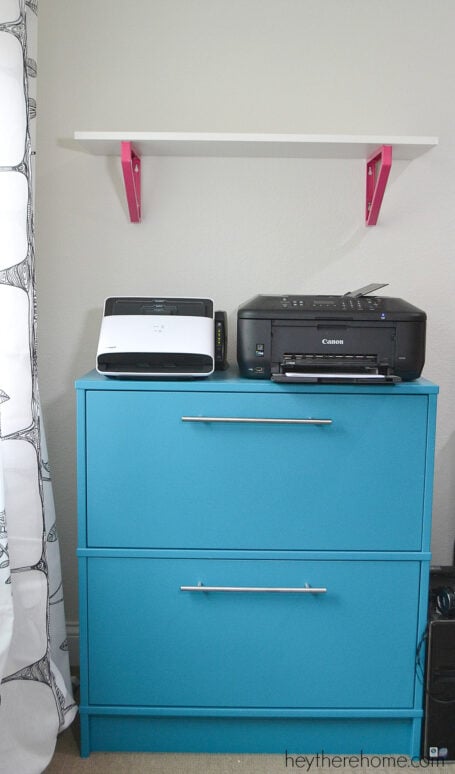
Plus, all of the electronics that make this room function were all crowed on top of the filing cabinet and it was a bit ugly. (You know me… I definitely want if to function, but I want it to look good too!)
You May Also Like


So I got to thinking about how we could take our existing filing cabinet and make our own shelves that would attach to it to create one big wall unit.
And I wasn’t about to wait any longer for J to have some free time to help me so I did a little research and remembered this awesome tool that I saw demonstrated at a conference a couple of years ago that allows you to make super straight cuts without a table saw - something I don’t own.
It’s called the Kreg Jig Rip Cut and it attaches right to your circular saw. You set the width and literally slide the guide along the edge and it makes one straight cut after another. Took all of the guesswork out of making my cuts.

Before cutting my boards, I thought about what I wanted to put on the shelves and planned out my dimensions on paper.
- The total width of my shelves was determined by the width of the existing filing cabinet since I was going to attach it to the top.
- I determined the height by taking into consideration the height of my ceiling (leaving room at the top) as well as the height of the binders that my husband needed to store on the shelves. Oh- and leaving room for the printer to work properly on the bottom shelf (the top of the filing cabinet.)
You will cut…
- 2 side boards: The height will be the height of each board + the thickness of each shelf.
- A board for each shelf and the top: The width of your final shelf – the thickness of the side pieces.
To attach the pieces of my shelf I used a Kreg Pocket Hole Jig to drill holes. It is awesome because it creates angled holes which make for much stronger joints.

It’s just a matter of clamping on the guide and predrilling to the set depth. Then the final step is to line up the two pieces you want to join and drilling in the screw.
Once my shelves were put together, I painted them the same color as the filing cabinet (Briny by Sherwin Williams.)

I used a left over piece of underlayment from our bathroom remodel and cut it to fit the back of the shelves. I painted it white and cut a small hole for cords before attaching it to the back of the shelves with small nails.
You can see that I cut the backing a bit short so that I could feed cords through the back of the bottom shelf. The best part about making your own DIY shelves is that you get to make them work exactly the way you want them to.

Adding a back will make your DIY shelves a lot stronger, but before you attaching the back, double check to be sure your shelves are perfectly square.
Once it was built, we set it on top of the filing cabinet and attached it using flat brackets in the back and L brackets in the front.

(Of course I sprayed the L brackets in the front gold to pretty it up a little bit.)

I love how having this large piece of fun colored furniture really grounds this side of the room and is the perfect place to store all of the things we need in the office plus the backing on the shelf hides a lot of the cords to keep it looking sleek.

Now it’s just a matter of getting the rest of our papers and random stuff organized and coming up with a good system to keep the mail under control and this office redo will be a wrap! Getting so close!

P.S. What if I told you there's a whole new (and way easier) way to decorate your home—without the overwhelm, indecision, or endless Pinterest scrolling.

Inside my online decorating program, Style Your Way Home, I'll walk you through the process of discovering and defining your decorating style, creating a home decor plan, and show you how to apply it in any space so each room is unique while maintaining a cohesive look that feels like YOU! - When you join now, you'll get direct support from me... it's like having a design BFF in your back pocket!
