DIY Painted Concrete Place Card Holders
I've combined some fun trends to show you how make these easy DIY Painted Concrete Place Card Holders for any occasion!
Are you as excited as me for the return of jeans weather? I love summer, but it’s always right around mid August that I start wanting fall to get here. So I decided to get going on some fall decor ideas so that I’m ready.
I plan to make a few changes to my fall tablescape from last year. First on my list is to add a few modern elements and since concrete is such a fun trend right now I thought these DIY painted concrete place card holders would be a perfect start.

Concrete is such a fun trend right now and it definitely fits in with my love for modern fall decor. This was the first time I’ve worked with concrete and it was a lot easier than I had anticipated. (And I cheated a little to make the clean up super quick- bonus!)
Let’s get to it.
Supplies For DIY Concrete Place Card Holders
This post contains affiliate links for your convenience. Read the full disclosure.
- Toilet paper rolls: You’ll use these as concrete molds. You’ll need 1 roll for every 2 place card holders you plan to make.
- X-acto knife to cut the rolls.
- Olive or vegetable oil and a brush
- Thick tape
- Cookie sheet lined with foil
- Quick setting concrete
- 16 gauge wire and wire cutters
- Alligator clips (I got mine at Michaels in the jewelry making section)
- Super glue (I used Krazy Glue)
- Mixing bowl, trash bag, and plastic fork
- Sand paper
- Craft paint (I used gold metallic paint from Martha Stewart)
- Painter’s tape and small paint brush

How To Make Concrete Place Card Holders
Step 1: Cut toilet paper rolls
Cut your toilet paper rolls with an X-acto knife so that they are about 2 inches tall. (I used an X-acto knife so that I didn't smush my rolls.) You want them to be perfectly round. I got 2 molds out of each roll and had a little bit left over from each roll (just to give you an idea of the height of mine).


Step 2: Make the bottom
Brush a thin layer of oil onto the inside of each roll. Then place it on a piece of tape and fold the edges up, making sure to keep your roll perfectly round. This is going to be the bottom of your place card holder and will keep the concrete from leaking out.

Step 3: Cut wire pieces
Cut your wire pieces so that they are ready to place in the wet concrete. You can decide how tall you want them, but keep in mind that you will place them into the concrete all the way to the bottom of your roll.

Step 4: Mix concrete
Mix your concrete according to the directions. Mine called for 4 parts concrete to 1 part water. I used 3 cups of concrete mix and had to add a bit more water than what it called for to get the consistency right.
Place your mixing bowl into a trash bag and pull it tight so that when you mix your concrete the bowl is covered in plastic. Mix it with a plastic fork. This makes clean up so easy.


Step 5: Fill the rolls
Using a plastic spoon, fill each toilet paper roll, leaving about ½ inch at the top. Give the cookie sheet a little jiggle to get the air bubbles and tap the top of each one with your finger to get it to even out if necessary.


Step 6: Insert wires
Insert the wires right away so that they stand up perfectly straight.
Set them aside to dry for about 4 hours or until you think they are completely dry.
Step 7: Remove the roll
Once they are dry, remove the toilet paper roll and give them a light sanding to get the extra paper off and fix any little blemishes that may have occurred.

Step 8: Add the paint
Now it’s time to paint! Originally I was going to use orange since I plan to use these on my fall table, but changed my mind to gold so that I can use them for Christmas or even New Year's decor too.
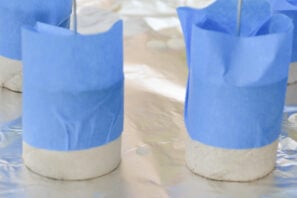
Tape off each concrete place card holder. I added paint to about the bottom third of each one and did some straight and some diagonal. Just be sure your tape is pressed down really well.
I gave them each 2 coats of metallic gold Martha Stewart craft paint and peeled the tape while they were still wet, then set them aside to dry.


Step 9: Add the clips
Add your alligator clips. First decide which is the best side of each place card holder and glue your clips on so that that side faces forward.
I used Krazy glue, which was the perfect choice here because it is such a small space and it didn’t run at all.
Be sure that you are gluing just one side of the alligator clip to the wire and not getting glue in the spring part of the clip or your clip won’t open. They don’t call this Krazy glue for nothing people! It is strong stuff and it dries quickly so be ready for that.


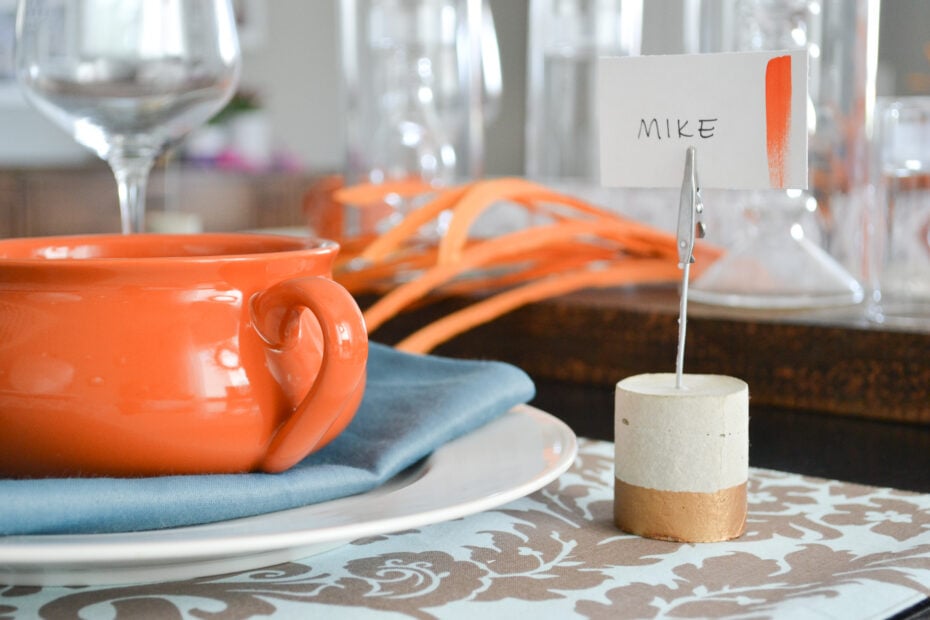
Once they are dry, add your name cards and set the table!

I love how these turned out! I'll admit that when I told my mom about my idea, she looked at me funny, but aren't they cute? They're a perfect addition to my modern fall tablescape, and will be great to display photos on shelves or even label food on a buffet!

P.S. What if I told you there's a whole new (and way easier) way to decorate your home—without the overwhelm, indecision, or endless Pinterest scrolling.

Inside my online decorating program, Style Your Way Home, I'll walk you through the process of discovering and defining your decorating style, creating a home decor plan, and show you how to apply it in any space so each room is unique while maintaining a cohesive look that feels like YOU! - When you join now, you'll get direct support from me... it's like having a design BFF in your back pocket!


