DIY Pantry Remodel: Pantry Closet Turned Built-In Pantry Cabinet
When we completely remodeled our kitchen we made huge improvements - but the pantry closet that the builder put in? That stayed the same. We meant to tackle it sooner, but a DIY pantry remodel felt like one of those projects that we'd have to figure out as we went, which can be intimidating.
The good news is that everything is figure-out-able. Yes, we hit a few snags along the way, but that's just part of creating the home you want that truly works for your family. And now that it's done, our new built in pantry has been a total game changer in how our kitchen functions day to day!
Not only is all our food in one place - no more stashing things in the closet under the stairs - we designed built in drawers at the bottom that the kids can easily access themselves. Keep reading to see how we turned our dysfunctional kitchen closet pantry into an organized built in pantry cabinet with pull out shelves and built in drawers.

In This Article
What Wasn't Working With the Old pantry closet
The standard pantry closet that the builder installed just wasn't working. Sure, it had shelves, but they were spaced poorly and didn't even extend to the full depth of the closet leaving a lot of wasted space at the top.
Worse, we also had to stash bulk items and canned goods in the closet under the stairs. So packing lunches or starting dinner often involved me going back and forth between the kitchen and the stairs - no good.
As a temporary fix we installed a pantry organization rack to hold smaller pantry items and used bins to control the clutter. They helped but as you can see everything was still a bit of a mess and frustrating to use.


Our Pantry Remodel Vision & Wishlist
Once we were ready to get to work, we created our wishlist with our goals:
- More storage in one place
- Kid-accessible drawers
- A clean built-in look
- Easy to maintain organization
The plan was to create a space to slide in a 90 inch Ikea pantry cabinet to match the existing cabinetry in our kitchen for a seamless look.
Pantry Remodel Products + Tools
This post contains affiliate links for your convenience. Read the full disclosure.
Products:
- Ikea Sektion high cabinet with 2 doors and 4 drawers
- Grimslöv door and drawer fronts (to match our existing Ikea kitchen cabinets)
- 2 additional hidden drawers:
- Narrow hidden drawer inside the top bottom drawer: Maximera low drawer with Utrusta low drawer front.
- Inside upper cabinet lowest hidden drawer: Maximera high drawer with Utrusta high drawer front
- Ikea Kallrör handles
- Drawer tray organizers
- Small bins and covered bins to organize snacks and hold oils
Tools:
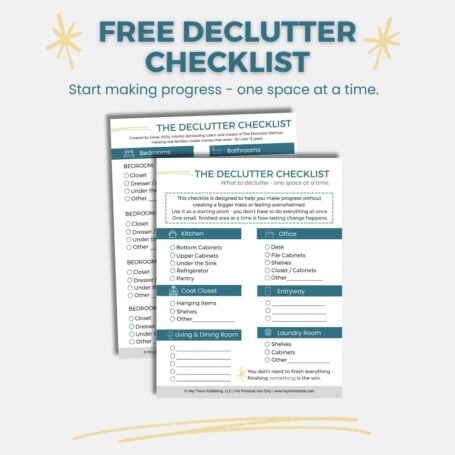
Feeling Stuck Or Overwhelmed By Clutter?
This free checklist helps you figure out exactly what to declutter - one space at a time - so you can make progress without creating a bigger mess.
The Process: How we Built Our Custom Pantry
1. Making room for the new built in pantry cabinet
The measurements on the inside of the closet gave us 40 inches to work with, but the cabinet we used was only 30 inches wide, so we had plenty of room to spare. We began demo by removing the existing closet door and shelves.

Once that was done, we measured out our cuts to allow for the cabinet to slide into place making sure our lines were plumb and level.

We started cutting from the inside of the pantry closet first so we could see what we were dealing with behind the wall, then moved onto cutting and removing the drywall on the outside wall.
We knew we'd have to remove the current door frame, and to make things easier and not have to re-frame both sides of the door we decided to place our pantry slightly off-center. It's barely noticeable and allows the pantry doors to fully open without interference from the nearby kitchen island.

Once the drywall was removed we removed the door framing using a reciprocating saw.
We rebuilt the side of the door frame with a new 2x4 to create a solid edge to attach the new cabinet.

2. Prepping the pantry cabinet base
We wanted to put our baseboard straight across the wall below the built-in pantry but since our kitchen baseboards are 5 inches tall, we needed a way to raise the cabinet higher than the IKEA legs would allow.
We also needed to be able to slide the cabinet easily into place for a tight fit, which the flimsy plastic legs wouldn't allow for. So we built a sturdy base.
First I built a simple box frame for the bottom using 2x5 boards and 2" wood screws.
After a dry fit inside the opening, we realized that we needed another ¾" in height so that the bottom drawer would clear the top of the baseboard when opened.

So we added a ¾" MDF piece between the base and cabinet and attached it from the inside bottom of the cabinet.
NOTE: The photo below shows the front of the base lined up with the front of the cabinet, which is not how it ended up. Remember I said everything is figure-out-able? Well, once we got the pantry cabinet in place, we realized that we needed to pull the cabinet forward about ¼″, instead of lining it up with the wall so that when you opened the drawers you wouldn’t see the gap. Pulling it out a little allowed for the trim piece at the end to hid the gap and make everything look super pro.

Then we slid the cabinet in place and shimmed the bottom for a perfectly plumb and level fit.
3. Installing the pantry cabinet (and re-installing it 😊)
I just mentioned that the first time we got the cabinet in place we realized that the placement was slightly off.
We'd lined up the front of the cabinet with the wall, but realized that when you opened a drawer you would see a gap or the ugly cut drywall.
So we pulled the cabinet back out, removed the base, pushed it back ¼", reattached the base, and slid the cabinet in again.
Note: We wouldn’t have known this before it was too late had we not tested the drawers and dry fitted the baseboard and trim before securing the cabinet, so dry fitting everything at each step is really important.
But once everything was dry fit and looked good - no more adjustments, thank goodness! - we secured the cabinet to the frame with screws from the inside.
Tip: If you’re installing hinges or drawer slides, make sure that you have them placed before securing your cabinet so you know which holes are okay to use.

4. Installing the baseboard below the built in pantry
Since our hardwood floors didn't run underneath the old closet, we couldn't have the wood base go all the way to the front or the cabinet wouldn't be level.
Our fix was to set the base back from the edge. Then we installed the cabinet and built out a piece of framing to attach to the baseboard across the front. This let us run our baseboard cleanly across the wall for a built-in look.

5. Adding trim for a finished look
Once everything was in place and the doors were on, we added 2 ¼" trim around the outside of the cabinet to give it a polished, built-in look.
You can see below that the cabinet frame comes out just a tiny bit more than the thickness of the trim we used, which hides that ugly gap and cut drywall I mentioned earlier.
We attached the trim with finishing nails, filled the holes, and sanded them smooth.
And to get the super finished look, I caulked the seams and then painted the trim with color that matched the cabinet perfectly.

You May Also Like


Our organized built in pantry with Storage That Works
I knew that this project would drastically improve the function of our kitchen, but what I didn't expect is how beautiful it would make this space!
The new pantry cabinet takes up more visual space and looks so nice, whereas the old pantry closet door looked small and not to scale.

And when you open the doors, it's also nice to look at because everything is organized and has a place, which will help me stop buying things we don't need!

Organized built in drawers the kids can use
One of the things that was most important when I was designing our new pantry layout was organization and making sure that the kids would be able to help themselves to what they wanted.
The built in drawers at the bottom of the pantry cabinet are perfect for this! We keep breakfast stuff and snacks in the bottom drawer, and grab-and-go lunch things in the top drawer.

And inside the top drawer there's a shallow hidden drawer to keep smaller things like granola bars and pouches organized!

Organized pull out shelves that make food easy to find
The top section of the pantry cabinet has three pull out shelves that hold canned goods, rice, pasta and sauces, oils, and baking items.
I do use a step stool to get something out of the back of the third pull out shelf, but because they pull out I can quickly grab what I need, rather than having to dig.
On the top two shelves I store baking items in bins that can be removed and set on the counter when I need them, and bulk boxes of crackers, and nuts.
And best of all - we no longer have any food stored in the under the stairs closet!
Everything in one spot feels soooooo good! 🙌

I just love how this new addition to our kitchen adds to the finished look of this space we created!

Final Thoughts: Worth Every Step
If you've been dreaming of a more organized kitchen, a DIY pantry remodel like this is absolutely worth the effort. It will transform the way your kitchen looks and how it works for your family. Plus it will help you stay organized every single day.
This project might be the push you need to rethink your own pantry - and maybe even dive into some decluttering too. I shared the simple mental shift that made decluttering my home way easier for me right over here.


P.S. Want 30 step-by-step tasks to completely declutter your home?
In my online course, The Declutter Method, you'll learn the simple mindset and efficiency hacks, plus get a step-by-step decluttering plan that will have you decluttering entire spaces without making a bigger mess and burning out. Join the hundreds of students who have made huge progress and seen big results!
